Introduction
This is Part 3 of a 4 part series on how to create an image search center on a MOSS site. My goal is to create a search results page similar to the Microsoft Live Search Images page. In Part 1 I explored the out of the box search experience for images and walked through the setup required to get the indexer to crawl image file types. In Part 2 I installed the XMP IFilter and demonstrated the capabilities related to Managed Properties. We concluded the post with an issue: Why don’t I see all of my properties?
Crawled Properties
As the indexer and IFilter work together to return properties from the files in the content sources SharePoint registers the new properties as Crawled Properties. You can view the Crawled Properties in Search Administration by choosing Metadata Properties in the Search Administration site and then clicking Crawled Properties on the toolbar. The names and values that are returned are based on how the IFilter was written. Some IFilters can be managed with mapping files to influence the properties returned and the names of the properties. It takes a bit of experimentation to get the mapping just right, but the effort is worth it.
Managed Properties
A Managed Property can represent one or more Crawled Property. The idea is fairly simple. Since the IFilters can return a property of a given name in a particular format the Search Administrator can use Managed Properties to create a common or friendly name for the property. You can also take several properties and combine them into one Managed Property. For example the MobilePhone property is mapped to People:CellPhone, ows_CellPhone, and ows_Cell_x0020_Phone. (The last one equates to “Cell Phone” with a space.)
Mapping Crawled Properties to Managed Properties
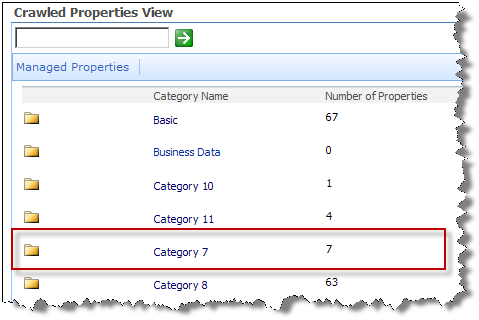
For our image search solution to work well I need the height and width of the images returned from all sources. The test so far has shown that only the Image Library returns the image dimensions. The implementation of the JPEG IFilter will extract the image details. I need to map the resulting fields to our existing managed properties. The trick is finding those properties. In our case several new properties are added as a result of our image crawl. A new category “Category 7” has been added with 7 new properties, though the names are not descriptive, I suspect that these are the additional properties that we seek.
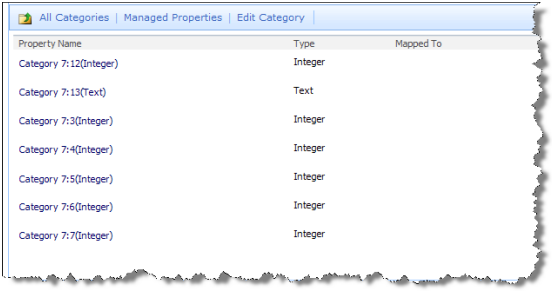
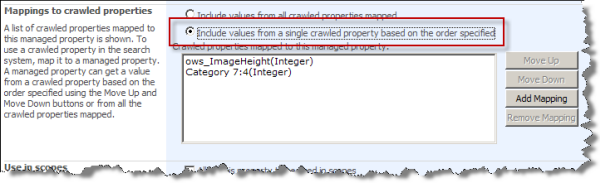
Through trial and error we find that “Category 7:13” maps to the text combination of width and height (e.g. “1024 x 768”) and “Category 7: 3” and “Category 7: 4” map to Width and Height respectively. The process to determine these values is simple though tedious. One by one each crawled property is mapped to a temporary managed property and displayed in the search results as a column. Evaluate each property as compared to the files that you are indexing. One hitch that you might encounter involves properties of type Integer. In our case PictureHeight and PictureWidth are already mapped to “ows_ImageHeight” and “ows_ImageWidth”. We need our new properties to be used for these properties. Edit the Managed Property PictureHeight and click the Add Mapping button. Select the appropriate crawled property (in our example “Category 7: 4”) and change the radio button to the “Include values from a single crawled property based on the order specified”. The settings should look like the following:
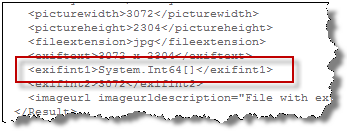
If you don’t change this setting for integer types, the search results will try to return all values and fail resulting in the display of the text: System.Int64[] as shown below. I created a managed property called ExifInt1 and mapped two integer properties, leaving the radio button set to “Include values from all crawled properties mapped”.
Property Display
OK, at this point you should have accomplished the following:
- Installed an IFilter to retrieve the property values that you want to extract from your files
- Mapped the Crawled Properties to Managed Properties
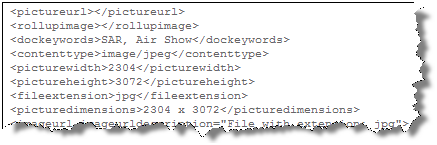
- Configured the XML test page to return the property values
- Tested the results and found the correct property values for every content source
Create the Picture Search page
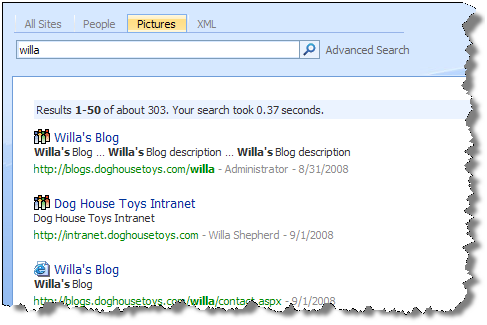
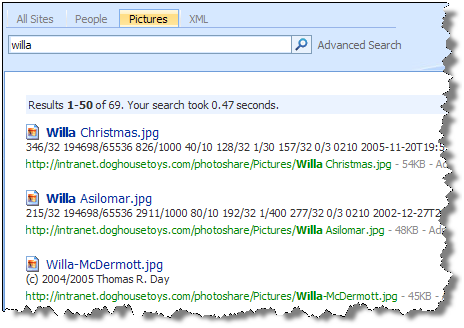
Next we need to edit the XSL of our search page to present the properties. For this purpose we will create a new Search Results page and a corresponding tab. Follow the directions for Creating an XML Test Page, but don’t change the XSL. Execute a simple search and note that the results should be exactly the same as the All Sites tab.
Next, edit the Core Search Results Web part and add the columns that we have configured to the display:
    <Column Name="PictureWidth"/>
    <Column Name="PictureHeight"/>
    <Column Name="ContentType"/>
    <Column Name="FileExtension"/>
    <Column Name="PictureDimensions"/>
Create a Picture Scope
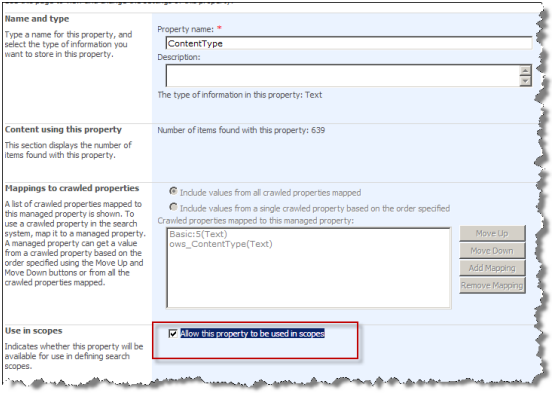
For our Picture search to be effective, we should only return pictures. We could filter them out in the XSL, but the search result values would be incorrect. It is easier to create a scope to return only image files. For this example I have found it easiest to filter on ContentType. ContentType is not available for scopes by default. Locate ContentType in the Managed Properties list and select the “Allow this property to be used in scopes” radio button.
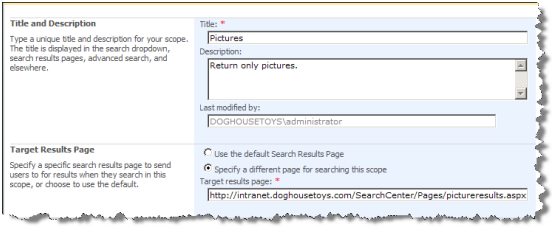
Browse to the View Scopes page by clicking the Scopes link from Search Administration. Click “New Scope”. Enter the information to create your new scope. Enter the address of your Picture results page as the target for this scope. (Just like the People scope.)
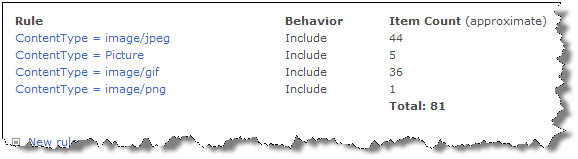
Add a new Scope Rule for each of the image types that you would like returned by the scope. For example images in picture libraries are ContentType=Picture, JPEG images are ContentType=image/jpeg. You can determine the content types from the XML Results page that we set up earlier in the series.

Continue adding scope rules for all of the content types that you want this scope to return. In my case I wanted Pictures, JPEG, GIF, and PNG. Once you are done, Update the scope.
Finish the Search Results Page
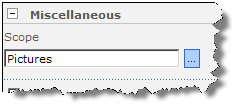
Now that we have a scope we can hard code the scope for our search results and add the properties to our results. Edit the Core Results Web part on the Picture results page and set the Scope property to “Pictures”.
Apply the setting and you should only see the pictures in your results. (If you don’t, backtrack and be sure your scope populated correctly on update.)
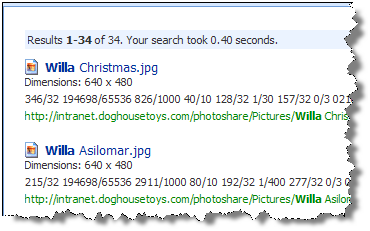
Now you can edit your XSL and add the properties. Edit the XSL property for the Search Core Results Web part and locate the tag <div class="srch-Description). Immediately above that tag insert the following XSL:
<div class="srch-Description">Dimensions: <xsl:value-of select="picturewidth" /> x <xsl:value-of select="pictureheight" /> </div>Save and publish your page and the search results should now show the dimensions for all of your images.
OK, but?
OK, I know, it does not look like Microsoft Live Images. We have all of the necessary components to render our results. In the next post we’ll complete the series by making these search results sexy!