I am in the process of updating all of my SharePoint 2010 projects from Beta to RC. I had a lot of fun learning how to use the Bing Maps Silverlight control for a few social computing demos that I built. Version 1 was released late last year and now it’s time to get upgraded! I figured there might be a few other folks in my position so here are the steps I followed.
My Application
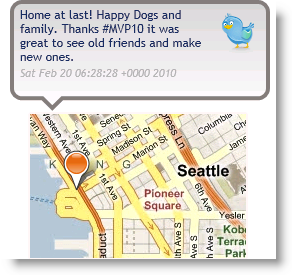
My application is not terribly complicated. I grab the location part of the Twitter Status message associated with an account name. This is what my last tweet from the MVP Summit looks like:

First Things First
-
The first order of business is to download the new version of the software.
-
You have to register for use this version of the Bing Maps service through the Bing Maps Portal.
-
There is a LOT of great help online and from the community for getting up to speed on the product. You should start with the Bing Maps Developer portal.
Update Your Project
After uninstalling the CTP and Installing version 1 the DLLs and Name Spaces have changed. I will detail the ones that changed for me and how I made everything work.
-
Update your project references. The assembly Microsoft.VirtualEarth.MapControl.dll is now Microsoft.Maps.MapControl.dll and there is a new Microsoft.Maps.MapControl.Common.dll both stored in C:\Program Files (x86)\Bing Maps Silverlight Control\V1\Libraries by default. Register both assemblies in your Visual Studio project.
-
Update your Silverlight namespaces. The namespaces in Silverlight XAML follow the changes in the project references. For example mine looked like this:
and I changed it toxmlns:Map="clr-namespace:Microsoft.VirtualEarth.MapControl;assembly=Microsoft.VirtualEarth.MapControl"(the intellisense helps)xmlns:Map="clr-namespace:Microsoft.Maps.MapControl;assembly=Microsoft.Maps.MapControl" -
Resolve the using statements. At this point I built my project and it failed to compile. I forgot about my using statements (in truth I didn’t forget…I just wanted to see if it would work…it didn’t.) So change any using Microsoft.VirtualEarth.MapControl lines to Microsoft.Maps.MapControl.
-
At this point I commented out any of my Map specific code so I could see if the control would render. It did.
-
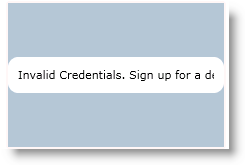
It appears I forgot to include those credential that I registered for at the top of the tutorial.
Add Credentials
Create a new like this using your Application Key
<Maps:ApplicationIdCredentialsProvider x:Name="MyCredentails"...<Map:Map x:Name="tbMap" CredentialsProvider="{StaticResource MyCredentails}"...Make the code work
My old code for adding a pushpin to the map required the use of a custom image and looked like this:
  private void AddPushpin(double latitude, double longitude, double size)
  {

      // pushpin image
      Image i = new Image();
      i.Source = new BitmapImage(new Uri("poi.png", UriKind.Relative));
      i.Width = 25;
      i.Height = 29;

      // set Map position before adding to Map Control
      Location loc = new Microsoft.VirtualEarth.MapControl.Location(latitude, longitude);
      i.SetValue(MapLayer.MapPositionProperty, loc);
      i.SetValue(MapLayer.MapPositionMethodProperty, PositionMethod.Center);
      (tweetBox.tbMap.FindName("PushpinLayer") as MapLayer).AddChild(i);
  }
The new code to accomplish the same thing more easily. I don’t have to use my own image.
private void AddPushpin(double latitude, double longitude, double size)
{
    // set Map position before adding to Map Control
    Location loc = new Location(latitude, longitude);
    //Create a new Pushpin
    Pushpin pp = new Pushpin();
    pp.Location = loc;
    //Add the Pushpin
    tweetBox.tbMap.Children.Add(pp);
    //Center the map on my location
    tweetBox.tbMap.Center = loc;

}
The Final Result
So after a bit of trial and error you should be able to get your project up and running. I hope this post will provide you with some basic guidance. Here is what my new control looks like in test.