Why Room Lists
When planning and preparing for an Office 365 deployment you can often get lost in the weeds of features and services and forget about the user experience of the individual services. I like to ensure that we plan for delighters when the service affords me the opportunity. The are several things about Microsoft Teams that drive me bonkers, like the client not respecting Windows 10 Focus assist settings, even Slack does that.
Room Lists are one of the delighters I like to be sure I get right. Room Lists, properly configured, enable your users to schedule a meeting and find meeting rooms with ease. Set up badly, or not at all, it can cause users to wonder if the deployment team even cares about the user experience.
Get Organized
I did mention that there is a little planning involved. You should decide how you want the Room Lists to appear in the user interface. Is there a common company jargon for corporate locations? If so USE IT! Remember, we are trying to help the users, so pay attention to the details. In my scenario, Dog House Toys has two new locations, Austin and Pipe Creek, both in Texas. I am going to add the Conference Rooms for each location to Room Lists for the locations so that they are grouped correctly. In Exchange Online, each Room is added as a Mailbox of type -Room and the room list for each location is a DistributionGroup or type -RoomList.
Lay of the Land
You can check the current configuration in Exchange Online by listing your Room Mailboxes.
# List Room Mailboxes
Get-Mailbox -RecipientTypeDetails RoomMailbox
You can check your current Room Lists as well:
# List the current Room Lists
Get-DistributionGroup -RecipientTypeDetails RoomList
Set Up the Rooms
In our case were going to configure the 3 conference rooms in Austin (we use river names) and the 3 conference rooms in Pipe Creek (based on night clubs in Austin) as follows:
# New Room Mailbox
New-Mailbox -Alias RioGrande -Name "Rio Grande" -DisplayName "Austin - Rio Grande" -Room
Set-Mailbox -Identity "Rio Grande" -Office Austin

New-Mailbox -Alias Brazos -Name "Brazos" -DisplayName "Austin - Brazos" -Room
Set-Mailbox -Identity "Brazos" -Office Austin

New-Mailbox -Alias Trinity -Name "Trinity" -DisplayName "Austin - Trinity" -Room
Set-Mailbox -Identity "Trinity" -Office Austin

New-Mailbox -Alias ScootInn -Name "Scoot Inn" -DisplayName "Pipe Creek - Scoot Inn" -Room
Set-Mailbox -Identity "Scoot Inn" -Office "Pipe Creek"

New-Mailbox -Alias Antones -Name "Antones" -DisplayName "Pipe Creek - Antones" -Room
Set-Mailbox -Identity "Antones" -Office "Pipe Creek"

New-Mailbox -Alias ContinentalClub -Name "Continental Club" -DisplayName "Pipe Creek - Continental Club" -Room
Set-Mailbox -Identity "Continental Club" -Office "Pipe Creek"
Make It So
Now all we have to do is create the Room List Distribution Group for each office (or building or whatever you decide is best).
# New Roomlist Distribution Group
New-DistributionGroup -Name "Austin Conference Rooms" –PrimarySmtpAddress "[email protected]" –RoomList
New-DistributionGroup -Name "Pipe Creek Conference Rooms" –PrimarySmtpAddress "[email protected]" –RoomList
…and then add the rooms. This can be done individually:
Add-DistributionGroupMember -Identity "Austin Conference Rooms" -Member Brazos…or in bulk.
# Get all RoomMailBoxes in the Pipe Creek Office
$PCConfRoom = Get-Mailbox -RecipientTypeDetails RoomMailbox -Filter {Office -eq 'Pipe Creek'} | select -ExpandProperty Alias
$PCConfRoom | Add-DistributionGroupMember -Identity "Pipe Creek Conference Rooms"
Test It In Teams
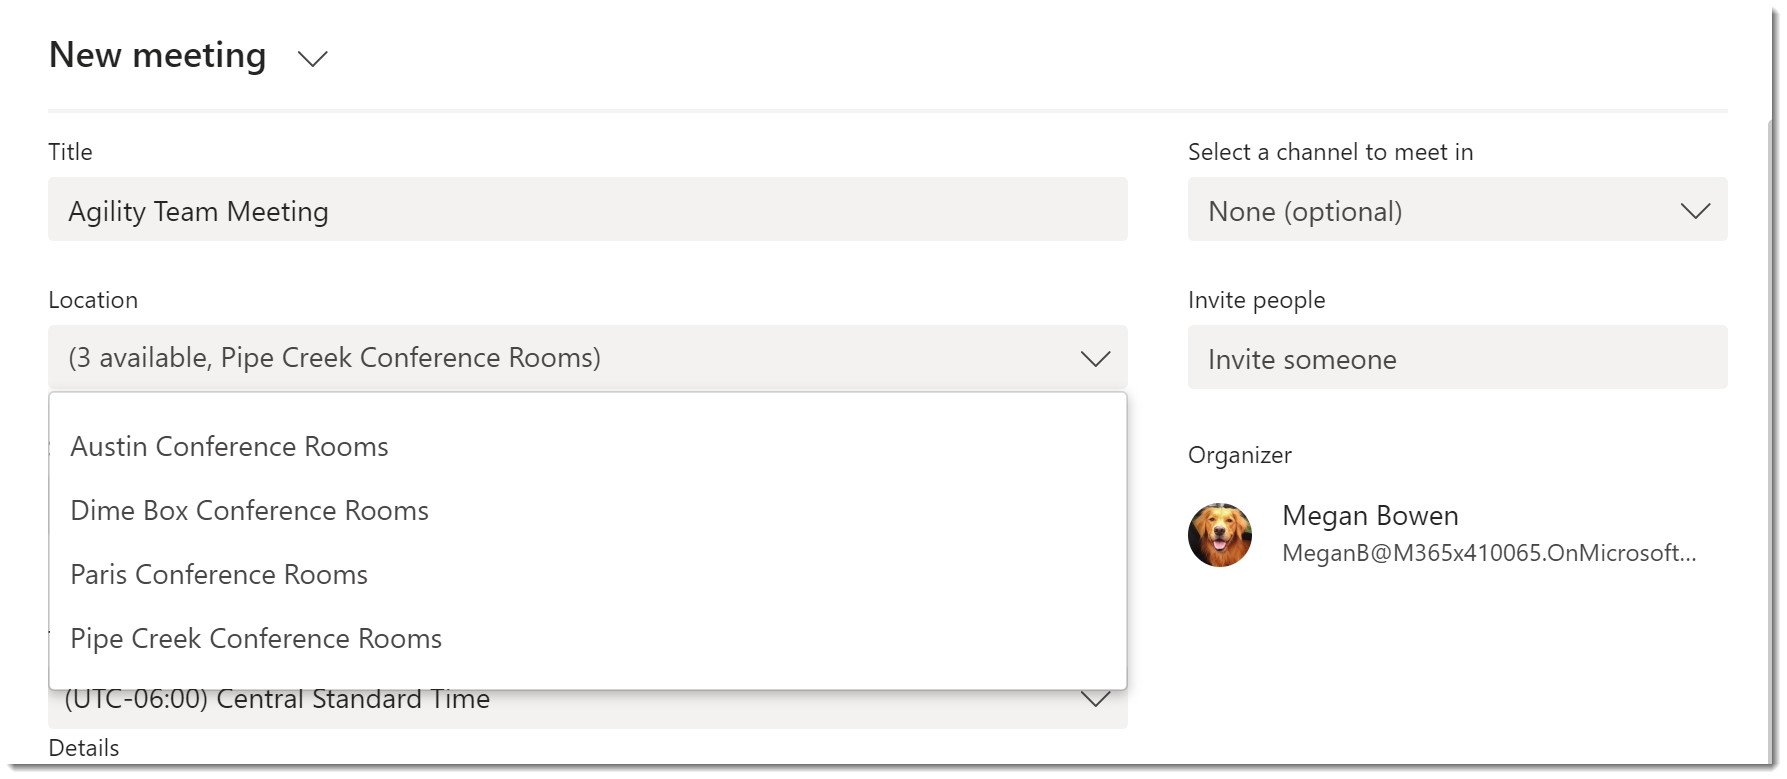
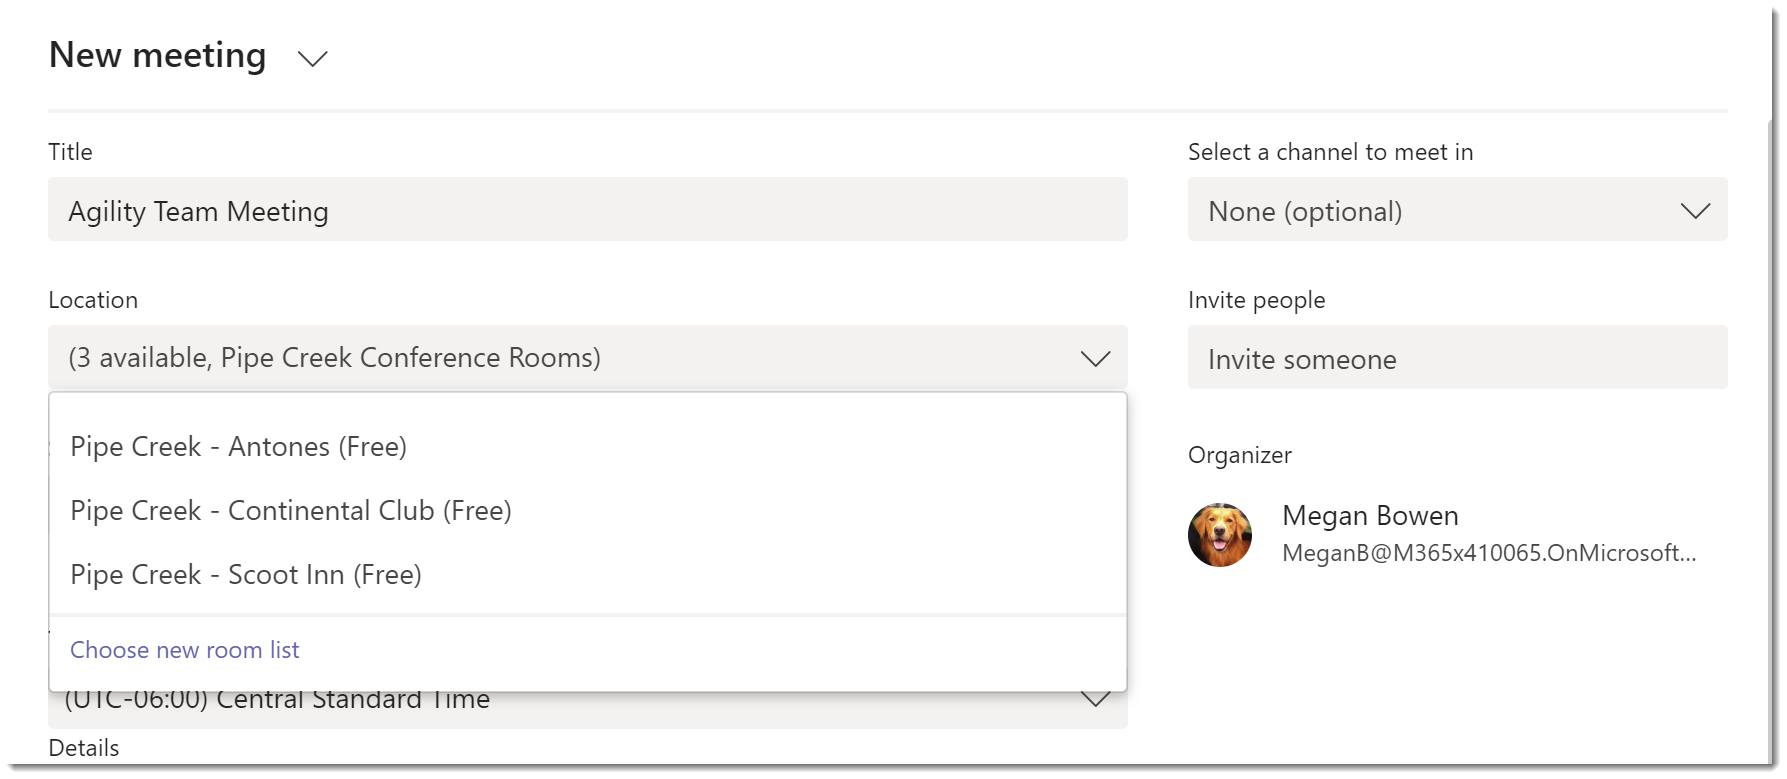
Delightful!